Thursday, February 27, 2014

Week 7:

This week my random blog post is going to be about tips to achieve the effect of bokeh in a picture. Bokeh is the quality of the portion of a photograph that is not in sharp focus. There are four basic techniques to improve your bokeh: adjusting depth-of-field, choosing the proper lens, creating custom bokeh, and using bokeh to relate with the foreground.

1. Adjusting Depth-of-Field:  A low aperture value produces short depth-of-field, and consequently a larger blurry portion of the image. The shorter the focal length, the greater the depth of field. Another thing to consider is lens-to-focal point distance.  A longer distance between the lens and the focal point creates a greater depth-of-field.

2. Choosing the best lens: Apertures which utilize more blades or have curved blades will produce more circular-shaped light bursts in the bokeh, while apertures with more octagonal openings produce a similarly-shaped light burst. Generally, more expensive lenses use more blades and/or utilize curved aperture blades in an effort to produce a more circular bokeh.

3. Creating Custom Bokeh:
Image by eirikso
People can create special cut-outs in various shapes to go on a lens. The shape of the cut-out will control the shape of the light bursts in the bokeh.

4. Relating the Foreground with the Background15 Beautiful Tips and Examples of Bokeh Photography
Relating the sharp foreground subject of an image with something in the blurry portion of the image can create a truly creative image.  Trying to maintain a equidistant between the camera and the subject comparing to the subject and the Background, will logically produce great results.


http://digital-photography-school.com/how-to-achieve-better-bokeh-4-simple-tips

Other facts that I found:
- Bokeh simply means Blur in Japanese language.
- The Number of Aperture or Shape of the blades defines the Nature of bokeh. For Example: an 8 Blade diaphragm will produce a Polygonal bokeh.
- Back-lit Background works great in producing pleasing Bokeh’s.
- The Larger the aperture better the Bokeh.

Some examples of bokeh:
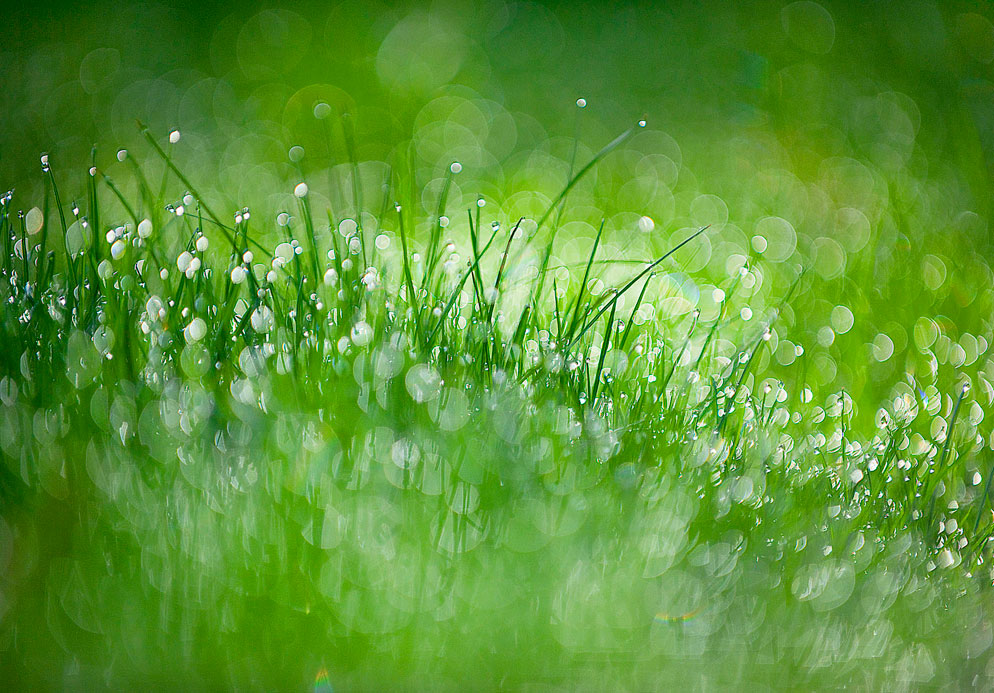
Jody Dole photo of grass with lots of bokeh
A 200mm lens was used to take this picture.


15 Beautiful Tips and Examples of Bokeh Photography

15 Beautiful Tips and Examples of Bokeh Photography

(http://121clicks.com/inspirations/15-beautiful-tips-and-examples-of-bokeh-photography)

Week 7: Rules of Dominance

Light is more attractive than dark.

Diagonal lines are more attractive than vertical ones.

Red is more attractive than yellow.


Sharpness is more attractive than blur. 

 
Difference draws more attention than conformity.

Thursday, February 20, 2014

Week 6

This week I decided to blog about the camera I use to take all my pictures, the Canon 7D.
Megapixels: 19.0
Image Resolution: Up to 5200 x 3462
Optical Zoom: 4.8x
Lens Focal Lengths: 35mm equivalent 28-135mm
Shutter Speeds: 1/60 - 1/8000 sec
Aperture Range: f/3.5 - f/5.6
ISO Equivalent: Auto: 100 - 6400Image Sensor Size: 0.88" x 0.59"

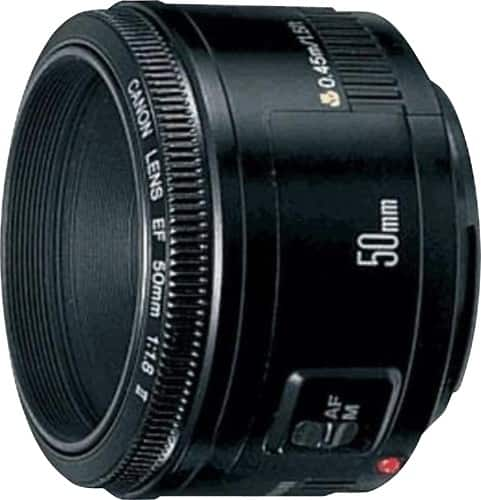
Canon - EF 50mm f/1.8 II Standard Lens - Black - Angle
Along with the kit lens (28-135mm) I also use this Canon 50mm f/1.8 II lens. Here are some features of this lens:
- f/1.8 maximum aperture: For optimal light gathering capacity, resulting in clear, highly-detailed images.
- 1.5' minimum focusing distance: Lets you come in close to capture every detail.
-46° angle of view: Lets you capture a wide area for greater detail.
 
 And here are some of my favorite pictures that I've taken with my Canon 7D:
 A spider at Pictograph Cave State Park.


 The two above were taken on my way back to my hometown of Fargo, ND. This was a beautiful drive because of all of the fog.

Geese flying at Riverfront Park.

 The two pictures above were taken in Yellowstone National Park.

 And here's just a cute picture of my dog Lola!

Thursday, February 13, 2014

Week 5: Night Photography

So, I had no idea what to post this week so I just found some pictures of night photography that we haven't really gone over or seen yet. I thought these pictures of volcanoes during the night were interesting.

Binsar Bakkara / AP. Mount Sinabung spews volcanic ash as seen from Tiga Pancur, North Sumatra, Indonesia,


Thursday, February 6, 2014

Week 4: Night Photography

This weeks blog post is about night photography so I decided to do some research on what camera lenses work best to get the best picture.

http://www.davidkinghamphotography.com/blog/2012/10/lenses-for-night-photography

David Kingham made an article on the best lenses to use and lists some helpful tips. He says that the most important factor is how much light a lens will let in so that shooting at lower ISOs is possible which means an aperture of 2.8 or greater (preferably 1.4). Therefore, zoom lenses are not the best to use because they usually only go to 2.8.


Here are also some night photography pictures that I found on National Geographic
(http://news.nationalgeographic.com/news/2013/05/pictures/130514-photos-world-at-night-aurora-borealis-milky-way-meteor-light-pollution/#/night-sky-contest-2013-twan-city-lights_67425_600x450.jpg)